THIRD-PARTY INTEGRATION IN INVITEREFERRALS
Managing the workflows and the business are now no more trivial tasks to handle. You can now integrate with the third-party apps which take care of everything right from managing your contacts, storing their information, and engaging them for promotional and other purposes.
CRM integration is one of them which eases your work as all your website visitors’ information can now be automatically synced in and stored in one integrated place. Apart from the basic information of the users, now you can also send and sync other information of the customers through the dynamic fields in InviteReferrals.
Read this article to know how you can configure dynamic fields in InviteReferrals while integrating with third-party applications.
HOW TO CONFIGURE DYNAMIC FIELDS IN INVITEREFERRALS :
In order to manage all the customer information and data in a CRM application, you need to first integrate InviteReferrals with the application so that you can send all the data related to your referral programs and campaigns easily.
Earlier, you could only send the data through the API via the key values. But, now you can add other fields such as the coupon code and referrer’s name, etc. to send to the CRM application.
Below are the steps to configure the dynamic fields in InviteReferrals :
1.Navigate to the InviteReferrals dashboard> campaigns> Integration.
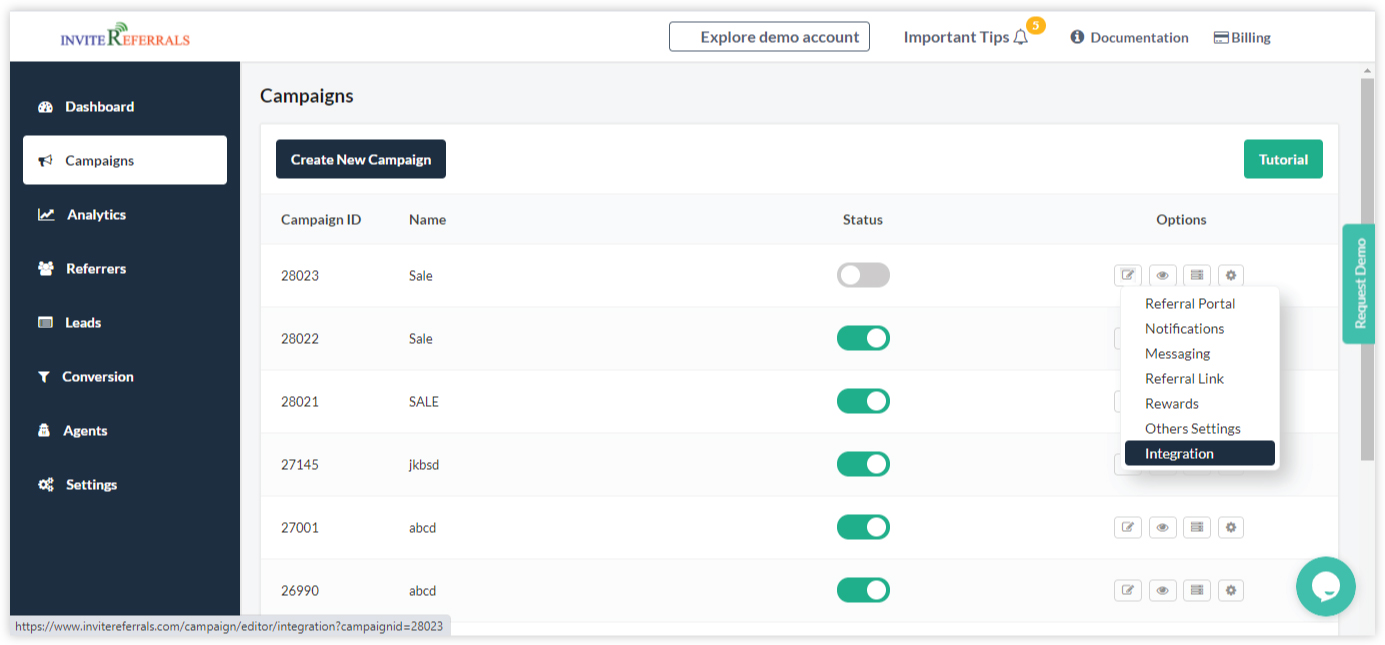
2. Click on INTEGRATION to proceed further to the THIRD PARTY INTEGRATION.
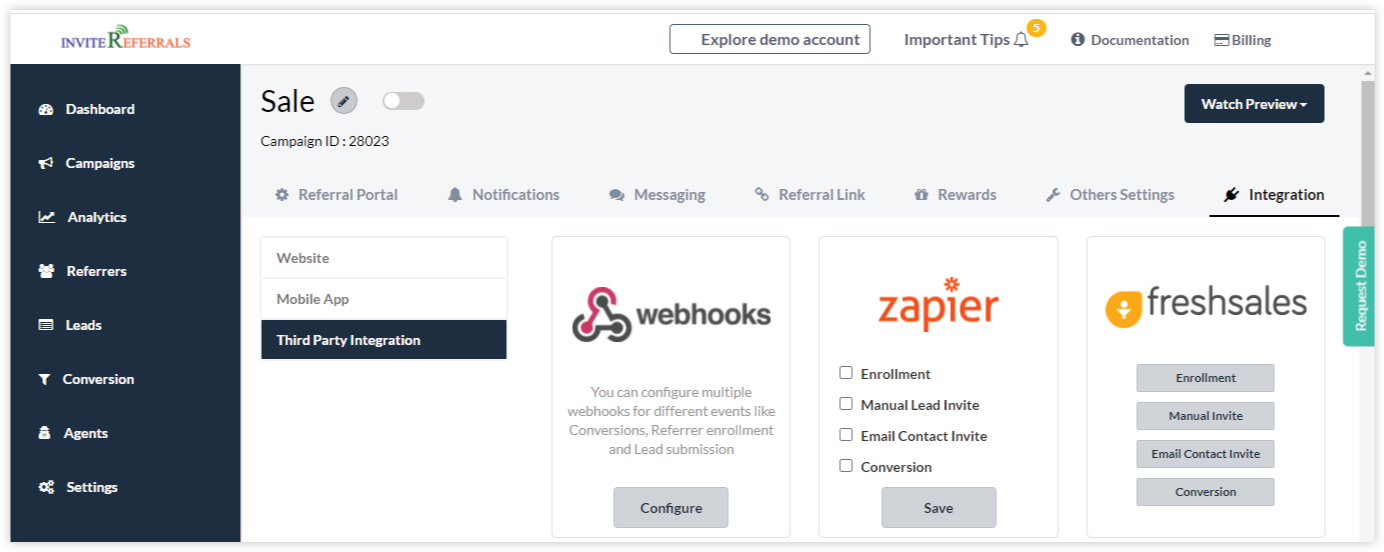
3. Next, click on your respective CRM integration, to begin with, mapping out the customized fields, and select any event whose data you want to send to the CRM. Here we have selected the FRESHSALES CRM. Read how to integrate freshsales with InviteReferrals.

4. Apart from configuring the “ last name field” which is mandatory, you can add the other fields. If you want to send the data related to the coupon code, referral link, referrer code, etc into the CRM. You can now have the option to add these predefined tags as shown in the below screenshot.
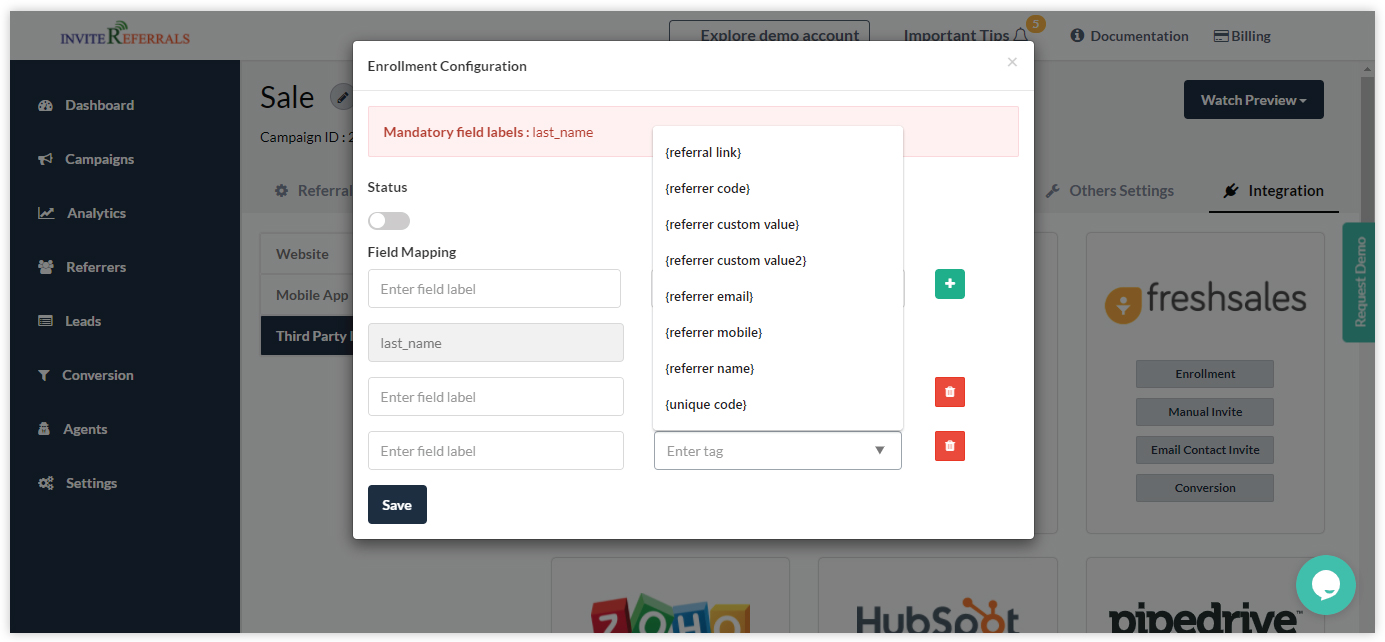
You can select the tags from the drop-down menu.
Note: You can add multiple fields as per your requirements. Also, you need to activate the status to send the data into the CRM.
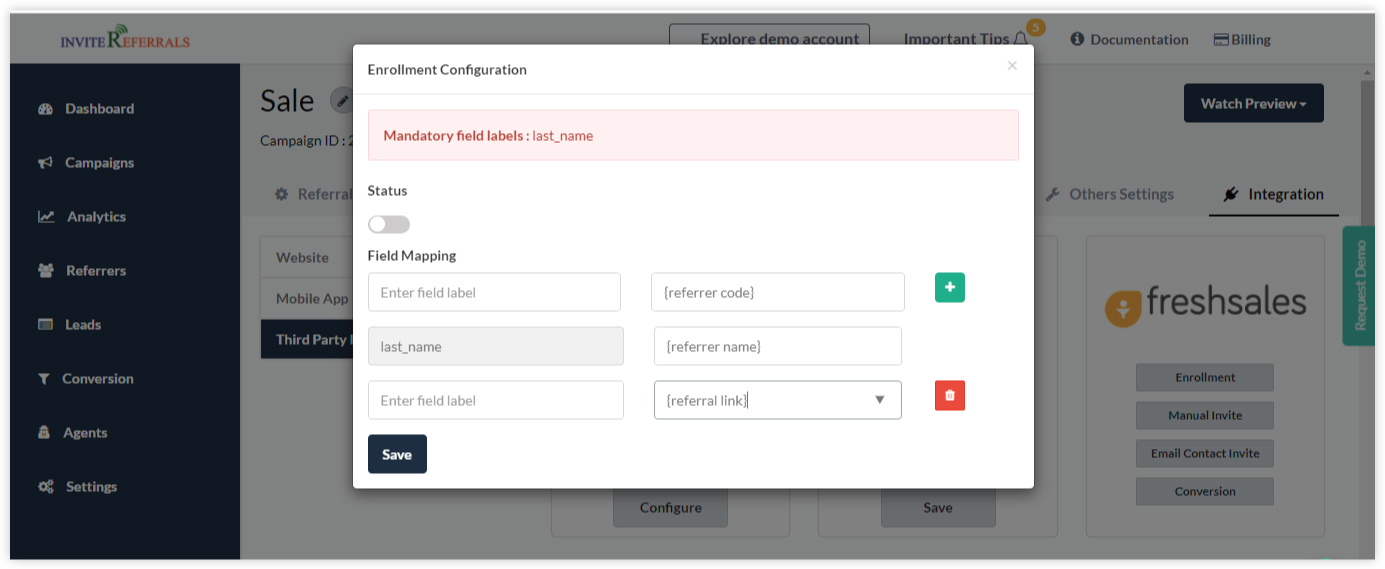
Simply add the fields and click on the SAVE button. Once you map out the fields, the data will start sharing into your CRM.